Plan Builder is a workflow tool that allows you to create and manage your safety and environment plans. The Plan Builder also houses all of EHS Hero’s individual plan documents, including plans, forms, and other plan-related documents.
1. Click Add New Plan on the Dashboard
2. Click Create New on the My Company Plans / My Custom Plans
3. Click Create Collection in the Hazards section of the Preferences page. This will create a plan that includes all the documents that are recommended to you based on your selected hazards.

Select Plan Template(s)

- Check the box to the right of one or more templates that you want to be included in your plan.
- Each template includes a plan document and any necessary supporting documents.
Click Create Plan.
- Click Upload your own Existing Plan if you want to start with your own plan document, with the option of adding additional pre-defined plan documents.
Edit Plan Documents

The Edit step will be where you do most of your work. In this step you can do the following:
- Change the plan title.
- Edit the documents that were included in the template(s) you selected in the previous step.
- Sections that are highlighted represent areas that you should enter in your own information.
- Add documents
- Click Add Document to insert a document from the Documents Library.
- Click Upload File to upload a WORD file from your computer.
NOTE: In order for your Plan's Table of Contents to read the headings in your document correctly, make sure to have the correct heading formats in place (H1, H2, etc.).
Click and drag the document titles on the left menu to rearrange where you want the documents to go in your final plan output.
Leave comments or notes to yourself as reminders or point to go back to in the future.
Click Save after all changes are made.
Click Update & Next to proceed to the next step.
Format Plan Output
NOTE: You should add locations in the Preferences tab before continuing to this step.
This step feeds off of the preferences you originally selected in the Preferences Tab.
Select the location(s) related to your plan.
Locations will show on the title page of the plan.
Review all selections and change any that need to be adjusted for this plan.
If you want to change the selection for all plans going forward, make edits in the Preferences Tab.
Click Submit to Reviewer(s) to send the plan through the review/approve workflow.
If you choose to skip the review/approve workflow, click Skip Review & Finalize Plan.
Review / Approve Workflow (Optional Step)

The Review and Approve workflow will allow you to assign a reviewer(s) to review and approve your Plan.
- Click Add to add reviewers to your review workflow.
- You can add reviewers during this step or within the Manage Reviewers/Approvers tab.
- Once all reviewers are selected, click Send review request.
- Plan reviews will be sent to the reviewers, in the order they were assigned, upon approval by the previous reviewer.
- As reviewers Approve or Reject your Plan, the Plan status will update accordingly.
- Click Skip Review & Finalize Plan to skip the review and approve workflow and finalize the plan.
Preview / Finalize Plan

Click Preview Plan to preview what your plan will look like in a PDF format before finalizing.
Click Finalize Plan to finalize the plan and move to the next step.
Download Finalized Plan
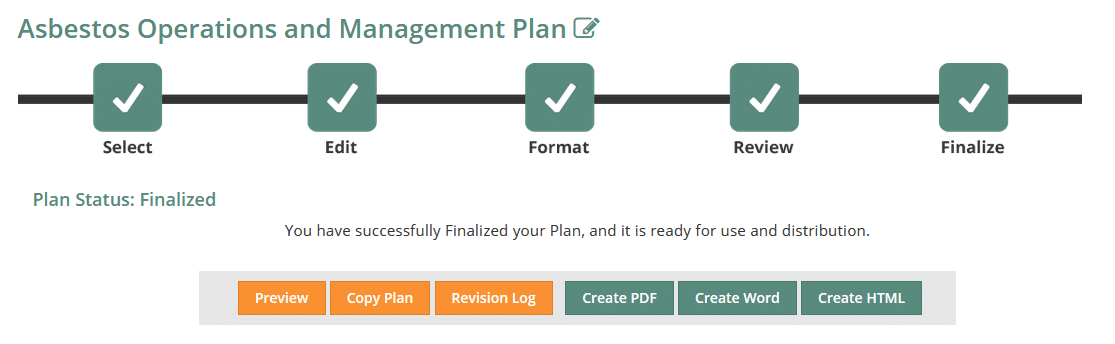
After the plan is finalized you will have the option to do the following:
- Preview: Preview the plan as a PDF document.
- Copy Plan: Make a copy of the plan. This is useful when you have plans that are very similar but not exact. This eliminates the need for you to recreate the plan for only minor changes.
- Revision Log: This shows when plan statuses were changed and document update dates.
- Create PDF: Download the plan as a PDF document.
- Create Word: Download the plan as a Word document.
- Create HTML: Download the plan as an HTML page.
Was this article helpful?
That’s Great!
Thank you for your feedback
Sorry! We couldn't be helpful
Thank you for your feedback
Feedback sent
We appreciate your effort and will try to fix the article